Home Assistant 的控制面板
Home Assistant 透過 HACS 新增 openHASP 整合
- Go to Home Assistant > HACS > Integrations.
- Click the Explore & Add Repositories button.
- Search for
openHASPand click on the openHasp logo. - Click Install this repository in HACS. Note: To install the current unstable development version select the Main.
- Click Install
- Reboot Home-Assistant
WT32-SC01 Plus 燒錄 openHASP (v7.0-rc4)
- Connect
GPIO0toGNDbefore booting the devide - Power-on or reset the ESP while
GPIO0is connected toGND - Start the flash process
esptool.py --port /dev/cu.usbmodem14201 erase_flash esptool.py --port /dev/cu.usbmodem14201 --baud 921600 write_flash 0x0 wt32-sc01-plus_full_16MB_v0.7.0-rc5_dd0c862.bin- Connect
按下 RST 按鈕,重新開機後配置 Wi-Fi
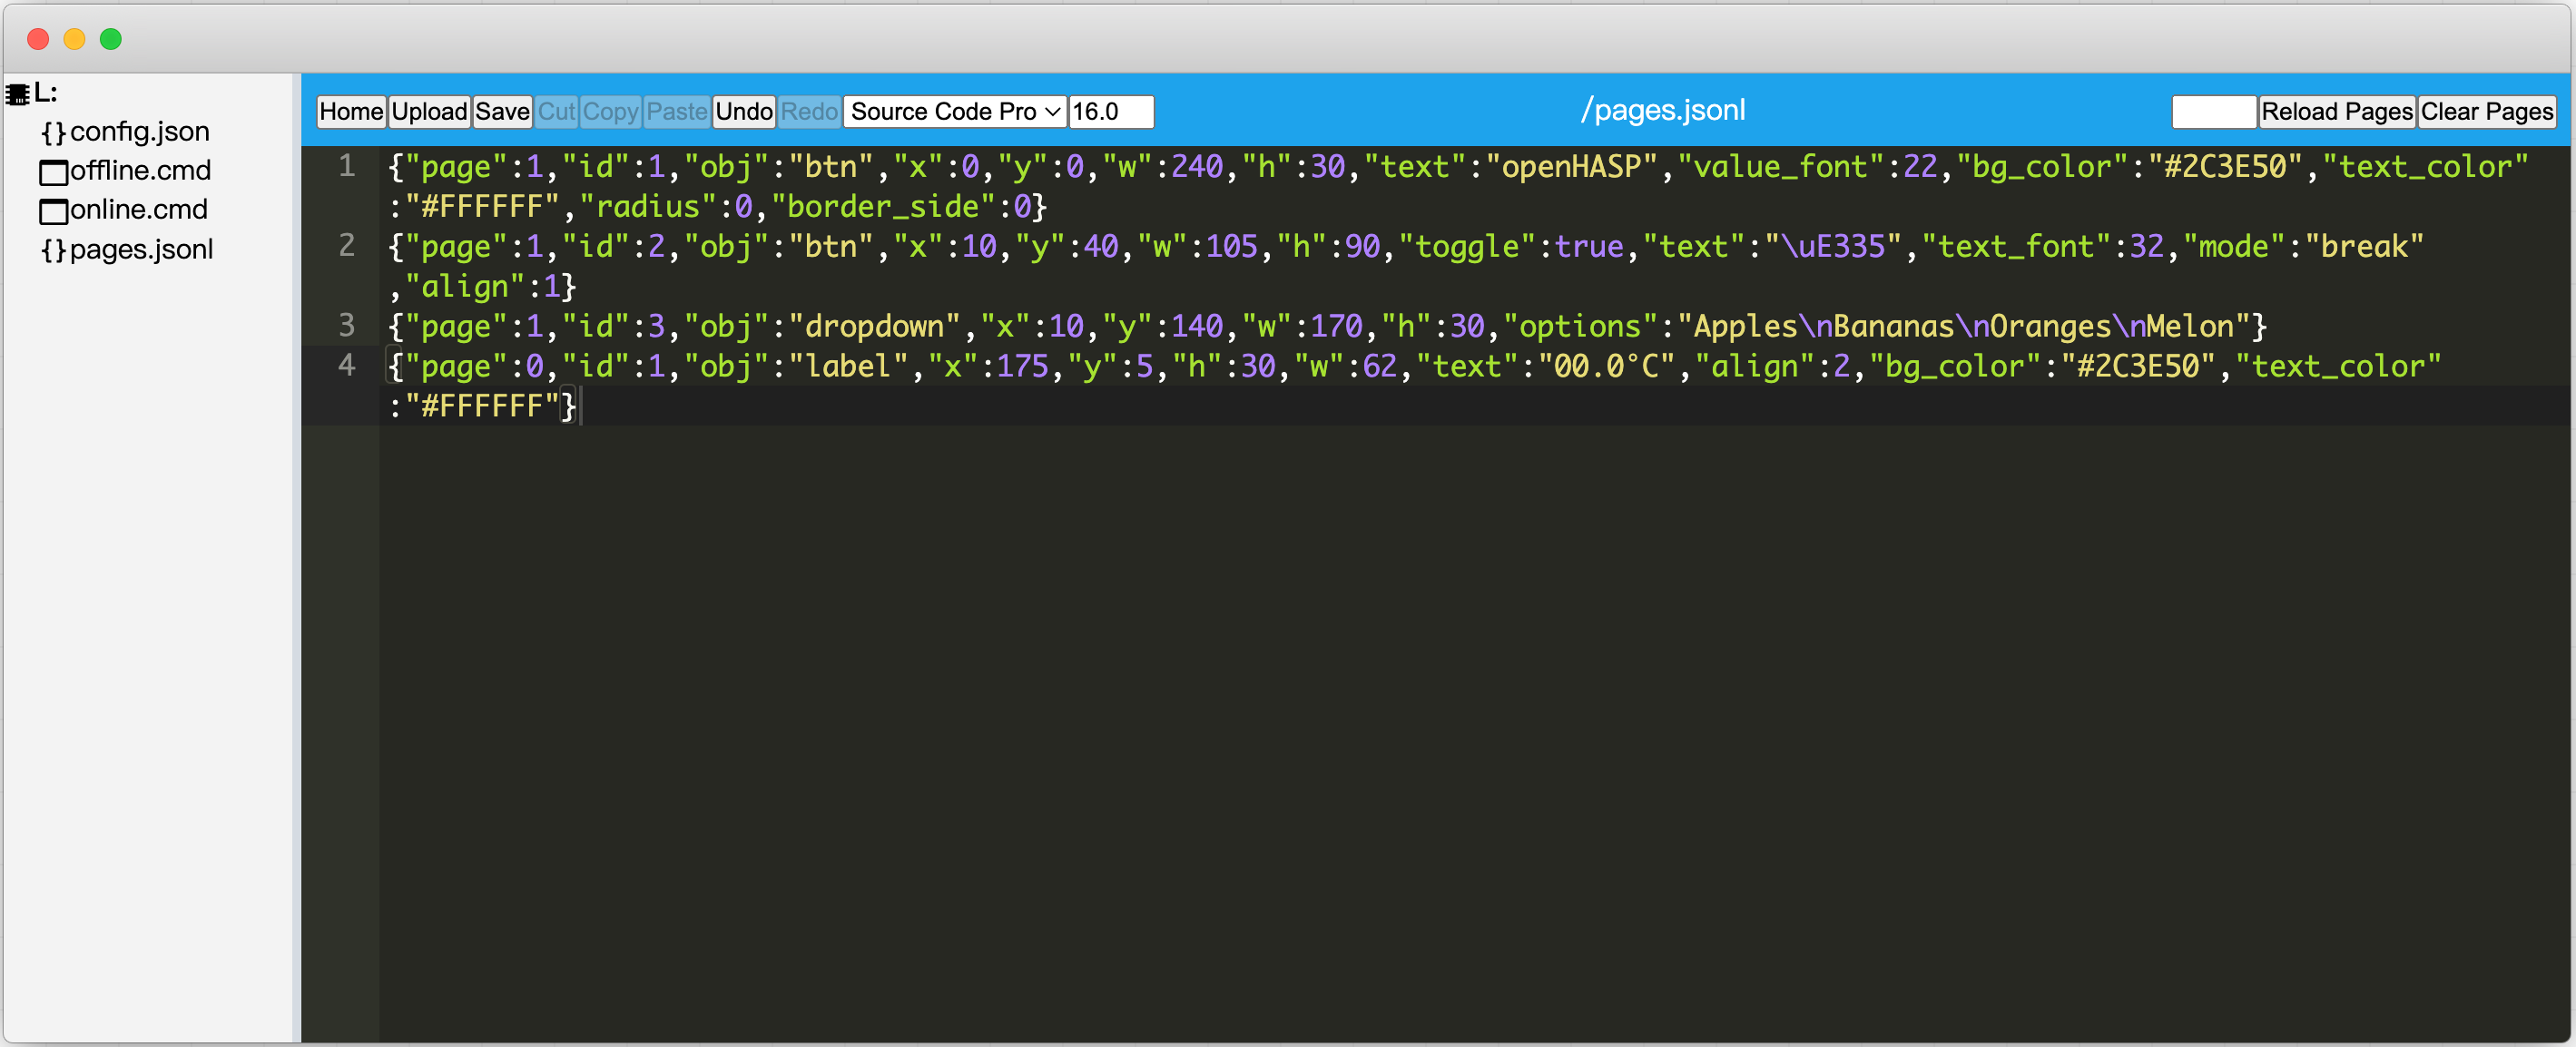
打開瀏覽器訪問 WT32-SC01 Plus device IP 並可以透過 File Editor 編輯 pages.json

整合連動 Home Assistant
Set the MQTT server settings and make sure each plate has a unique node name, save and reboot.
編輯 Home Assistant configuration.yaml
新增一行
openhasp: !include openhasp.yaml新增檔案 openhasp.yaml 並添加以下內容
plate35:
    objects:
      - obj: "p0b1"  # temperature label on all pages
        properties:
          "text": '{{ states("sensor.my_room_temperature") }}°C'
      - obj: "p1b2"  # light-switch toggle button
        properties:
          "val": '{{ 1 if states("light.my_room") == "on" else 0 }}'
          "text": '{{ "\uE6E8" if is_state("light.my_room", "on") else "\uE335" | e }}'
        event:
          "up":
            - service: homeassistant.toggle
              entity_id: "light.my_room"
      - obj: "p1b3"  # dropdown
        event:
          "changed":
            - service: persistent_notification.create
              data:
                message: I like {{ text }}
重新載入 HA 整合設置
Configuration > Devices & Services > openHASP > (your plate >) 3dots menu > Reload.檢查WT32-SC01 Plus 連線是否成功
訪問
http://deviceIP/info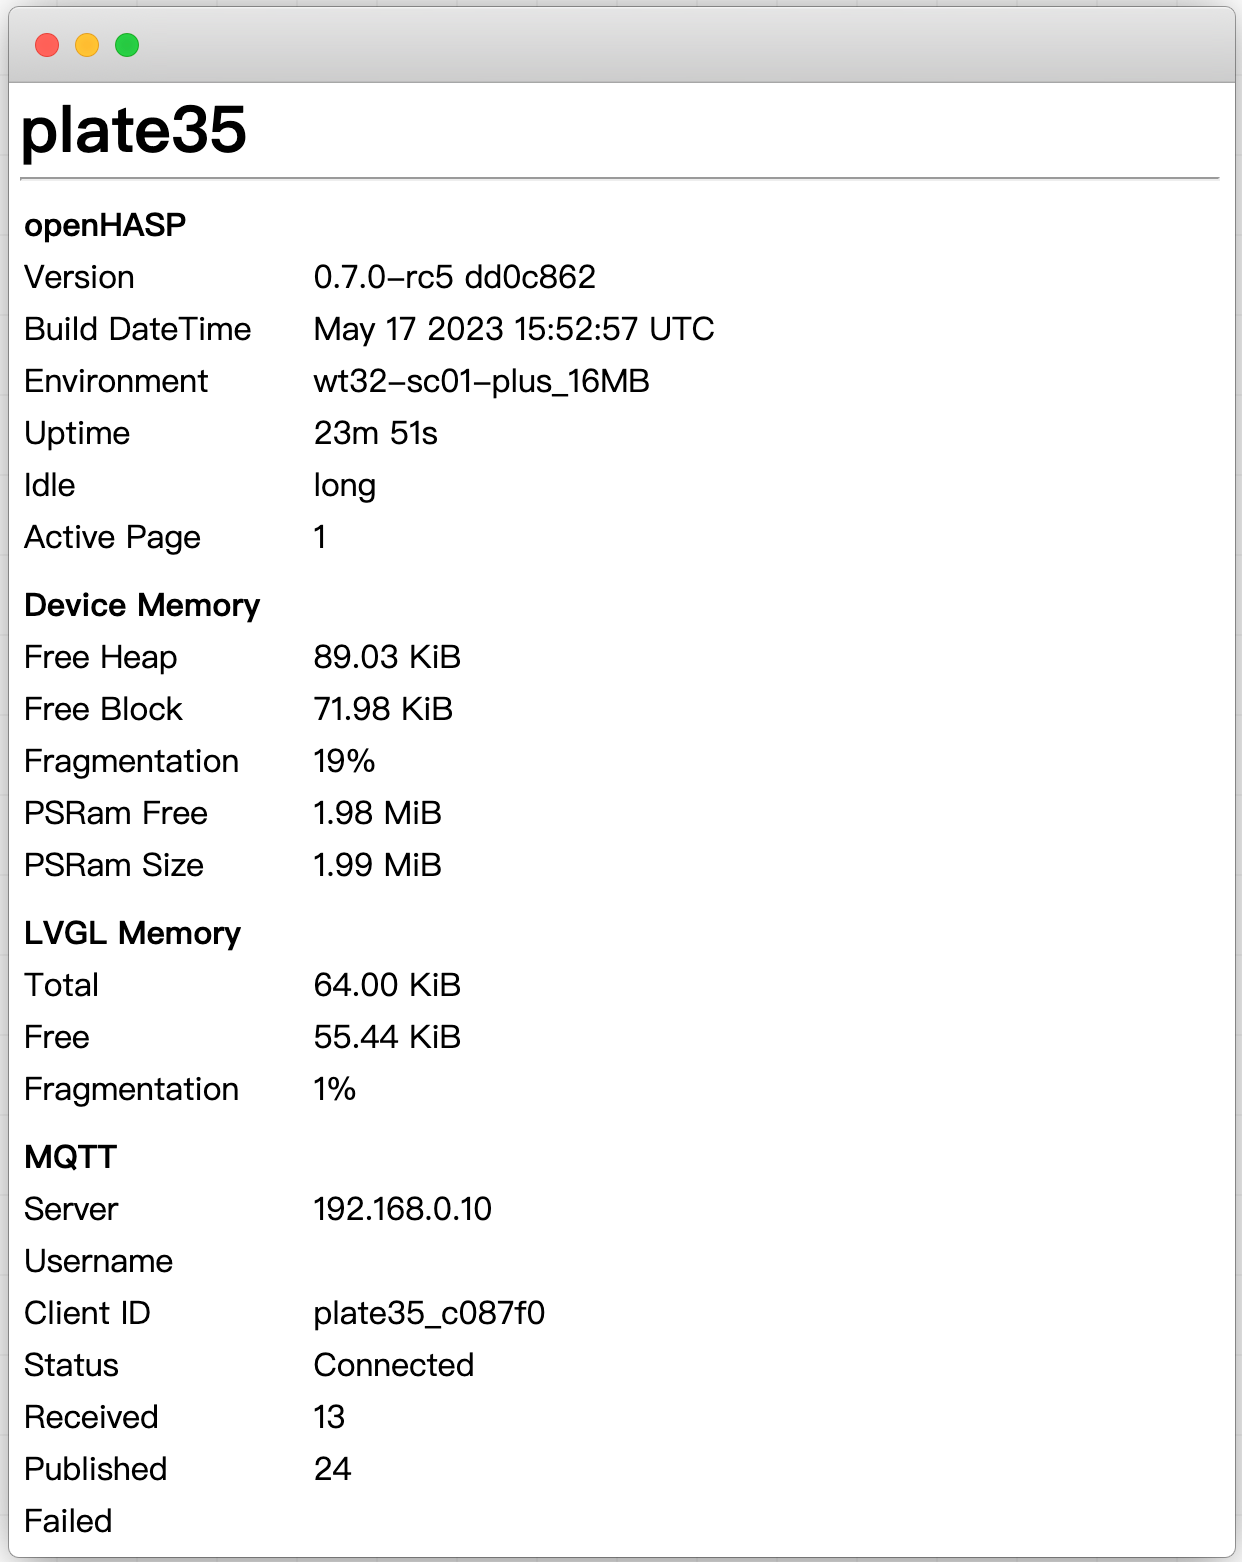
參考:
How-To - openHASP (haswitchplate.com)
HASwitchPlate/openHASP: HomeAutomation Switchplate based on lvgl for ESP32 (github.com)